
In this article, we are going to deploy a web application on AWS serverless, which means we don’t have to manage servers at all, no scaling of servers, nothing. In today’s world, most businesses need serverless architecture, where they should mainly focus on building the businesses, not managing the time in managing the servers or any kind of downtime.
Introduction to Serverless Architecture
Serverless means we don’t have to manage the servers, allowing developers to write code and deploy it easily without managing the servers. Serverless is a FaaS service, which means Functions As a Service. This serverless computing is highly available, efficient, and scalable.
Serverless architectures are based on EDA (Event Driven Architecture) which means they will triggered by some events like HTTP requests, file uploads, or on a scheduled basis.
Serverless is the Pay As You Go model that makes the cost-effective which means we are paying for the computing power that we use.
Prerequisites and AWS Services
- AWS Account
- IAM Role
- AWS Lambda for writing functions or code where we will deploy
- AWS API Gateway to create a RestFul API
- NOSQL Database i.e DynamoDB
Deployment of Website on AWS
Before heading to AWS let me show you how the website looks, and what we are going to achieve.
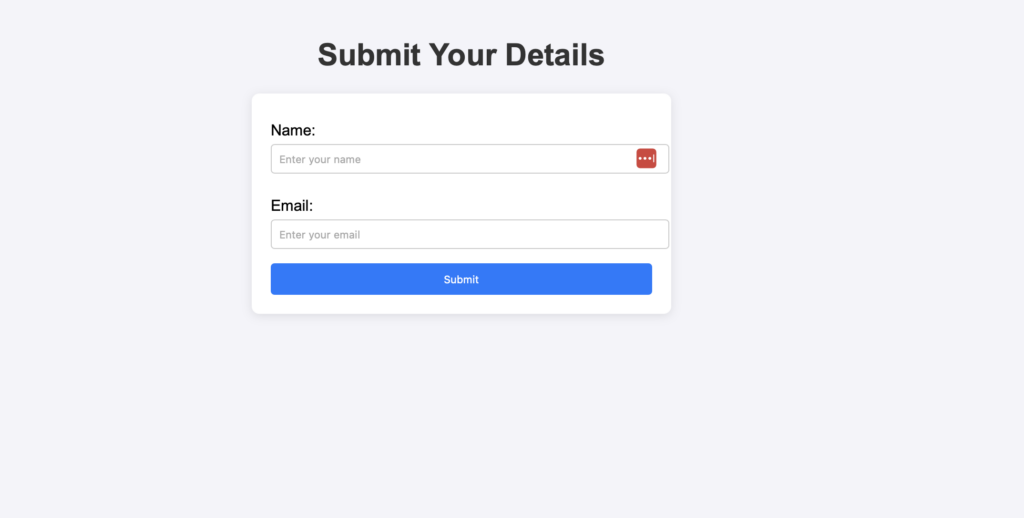
At the end of our blog, we had deployed this website on AWS and accessed this website with S3 Static Website Endpoint which means we are hosting this website on S3 (index.html), and when we fill in the details it will show “Data Submitted Successfully“ and add the record into DynamoDB table.
GitHub Code: https://github.com/Parathantl/serverless-code
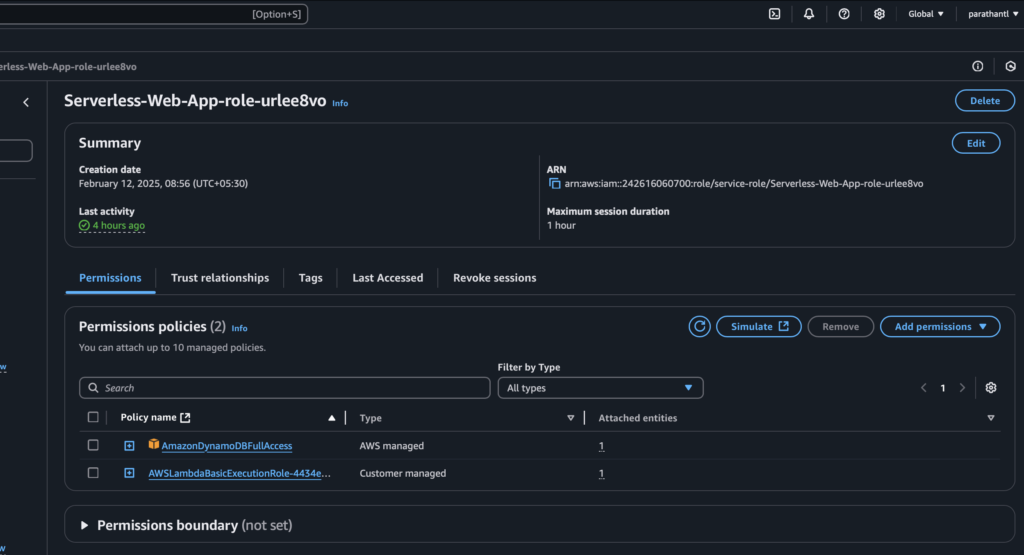
IAM Role
Create the IAM role that will communicate with the required services. Navigate to IAM, and click on Create Role.

- Now, select AWS service and choose Lambda under Usecase then give the required permissions for API Gateway, DynamoDB, S3 Bucket then click on Next and name the role
ServerlessWeband click on Create Role. AmazonAPIGatewayInvokeFullAccessAmazonDynamoDBFullAccessAmazonS3FullAccess
AWS Lambda
In AWS, we had EC2 instances which are virtual servers that have limited RAM and CPU where the EC2 instances are continuously running if they are stopped so we are paying also this, and to scale EC2 instances we create Autoscaling Groups.
But in AWS Lambda they are a virtual function which means we don’t need to manage the servers, don’t need to provision the servers and they run ON-DEMAND where scaling is automated.
It supports multiple programming languages like Node.js, Python, Golang, Java, C#, and Ruby. On AWS Lambda it follows the Pay AS You Go model. In Free-tier AWS account it provides 1 million free requests.
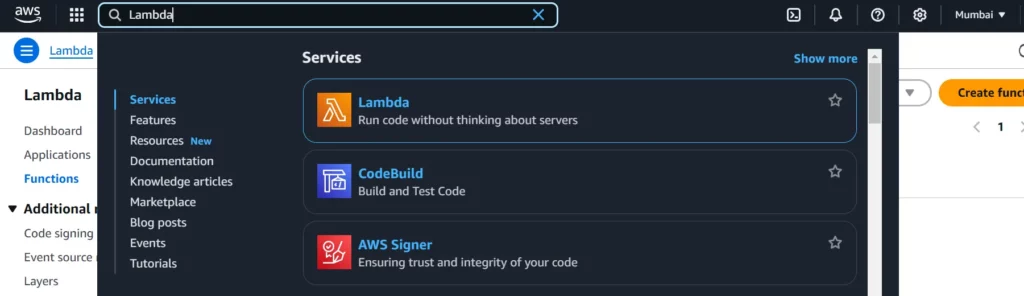
Navigate to AWS Management Console and search Lambda
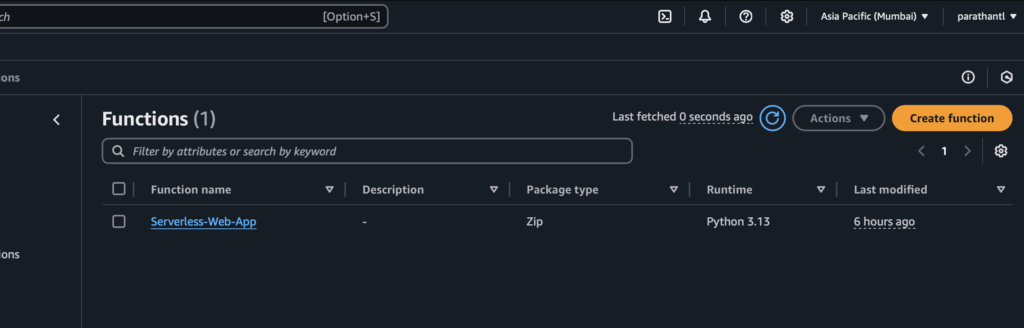
Click on Create Function name Serverless-Web-App, choose Runtime Python 3.13 then change the default execution role. Select Use an existing role that you had created earlier ServerlessWeb then click on Create on Create Function.
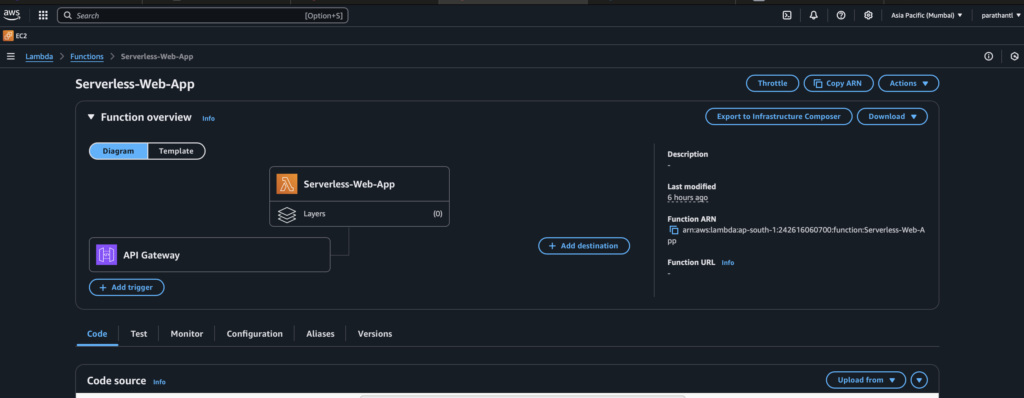
Don’t worry we will see the API Gateway also when we create API Gateway. Now, paste the code and Deploy the changes.
import json
import boto3

dynamodb = boto3.resource('dynamodb')
table = dynamodb.Table('web-app')  # Replace with your DynamoDB table name

def lambda_handler(event, context):
    print(json.dumps(event))

    if event['httpMethod'] == 'OPTIONS':
        return {
            'statusCode': 200,
            'headers': {
                'Access-Control-Allow-Origin': '*',  # or your frontend domain
                'Access-Control-Allow-Headers': 'Content-Type,X-Amz-Date,Authorization,X-Api-Key',
                'Access-Control-Allow-Methods': 'POST,OPTIONS'  # Allow POST and OPTIONS methods
            },
            'body': json.dumps('CORS Preflight Request handled successfully')
        }

    # POST Request Handling
    if event['httpMethod'] == 'POST':
        # Check if the body is present in the event
        if 'body' not in event:
            return {
                'statusCode': 400,
                'headers': {
                    'Access-Control-Allow-Origin': '*'  # Allow all domains or specify one
                },
                'body': json.dumps('Invalid request: No body in the request')
            }

        try:
            body = json.loads(event['body'])
            name = body.get('name')
            email = body.get('email')

            # Ensure both 'name' and 'email' are provided
            if not name or not email:
                return {
                    'statusCode': 400,
                    'headers': {
                        'Access-Control-Allow-Origin': '*'  # Allow all domains or specify one
                    },
                    'body': json.dumps('Invalid input: Name and Email are required')
                }

            # Save to DynamoDB
            table.put_item(
                Item={
                    'email': email,
                    'name': name
                }
            )

            return {
                'statusCode': 200,
                'headers': {
                    'Access-Control-Allow-Origin': '*'  # Allow all domains or specify one
                },
                'body': json.dumps('Data stored successfully!')
            }

        except json.JSONDecodeError:
            return {
                'statusCode': 400,
                'headers': {
                    'Access-Control-Allow-Origin': '*'
                },
                'body': json.dumps('Invalid JSON format')
            }
        except Exception as e:
            return {
                'statusCode': 500,
                'headers': {
                    'Access-Control-Allow-Origin': '*'
                },
                'body': json.dumps(f"Internal Server Error: {str(e)}")
            }
In this code, we have to replace our DynamoDB table name in 5th line. After deploying the changes go to API Gateway
API Gateway
API Gateway are serverless API that provides Restful API’s to the clients and after integrating with Lambda it proxies the requests to our Lambda functions.
It has 3 endpoint types:
Edge-Optimized (default) — To improve latency requests are routed through Cloudfront edge locations.
Regional — It is for the same region.
Private — It can be accessed from private VPC with the help of VPC Endpoint.
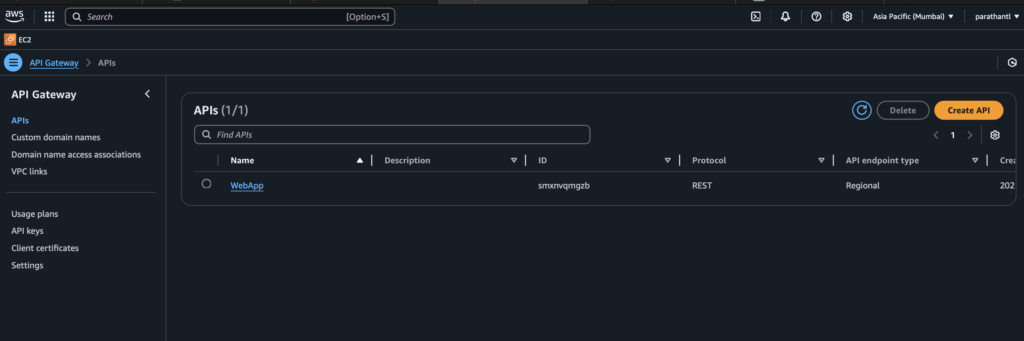
Now, navigate to AWS Management Console and search for API Gateway.
- Click on Create API and choose the API type REST API.
- Click on Build and name it
Web-App, select Regional Endpoint Type then click on Create API.
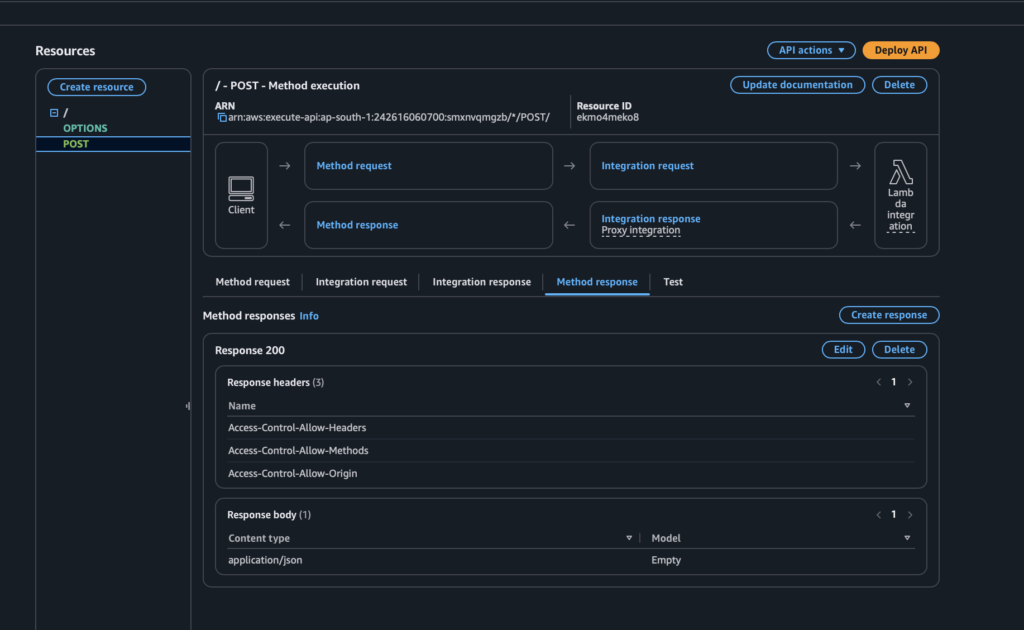
Now, create the method POST and OPTIONS. Click on Web-App then click on Create Method.
Select Method Type POST, Integration type Lambda enables the Lambda Proxy Integration by which the entire HTTP request will be forwarded to the Lambda function. Choose the Lambda function ARN which we created earlier Serverless-Web-App then click on Create Method.
Now, we have to create another method type OPTIONS that will handle CORS errors and preflight requests. Select MOCK Integration Type and choose the same Lambda function Serverless-Web-App.
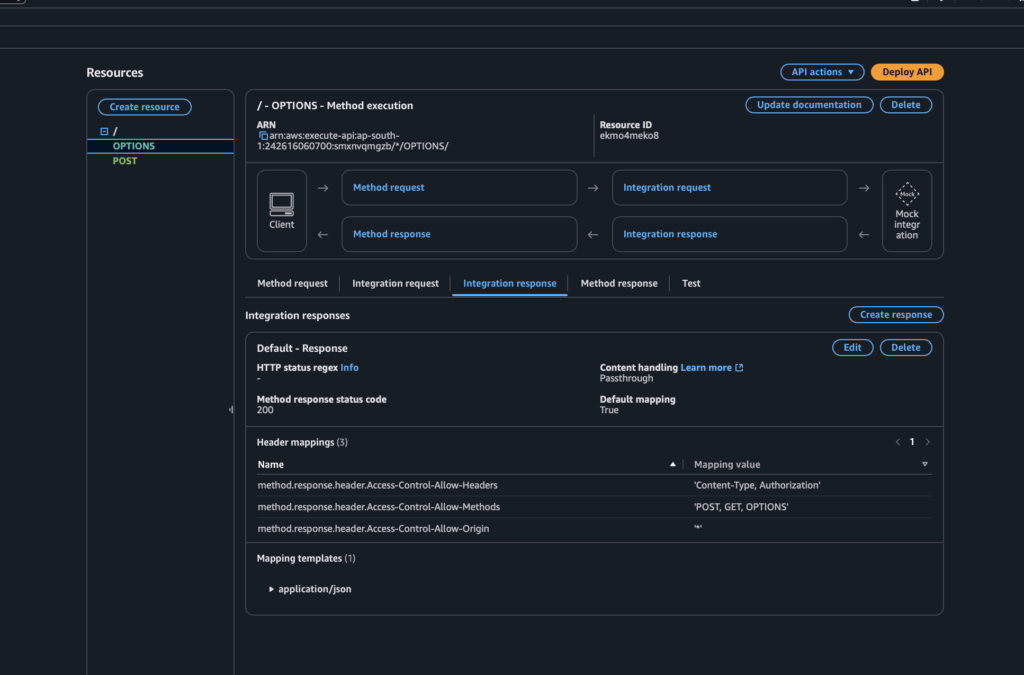
- Now, click on OPTIONS method and add method Method Response under 200 Status Code. Click on Create Response under Header Name add these headers.
Access-Control-Allow-HeadersAccess-Control-Allow-MethodsAccess-Control-Allow-Origin- Then click on Save.
- Go to Integration Response under OPTIONS method add the value to the Response headers.
Access-Control-Allow-Headers'Content-Type, Authorization'Access-Control-Allow-Methods'POST, GET, OPTIONS'Access-Control-Allow-Origin'*'

- Click on Save.
2. Click on the POST method and add the same Method Response headers.
Now, click on Deploy the API where you need to create a New Stage to save the changes.
Scroll down, and you will get the Invoke URL to add this URL to the index.html file.
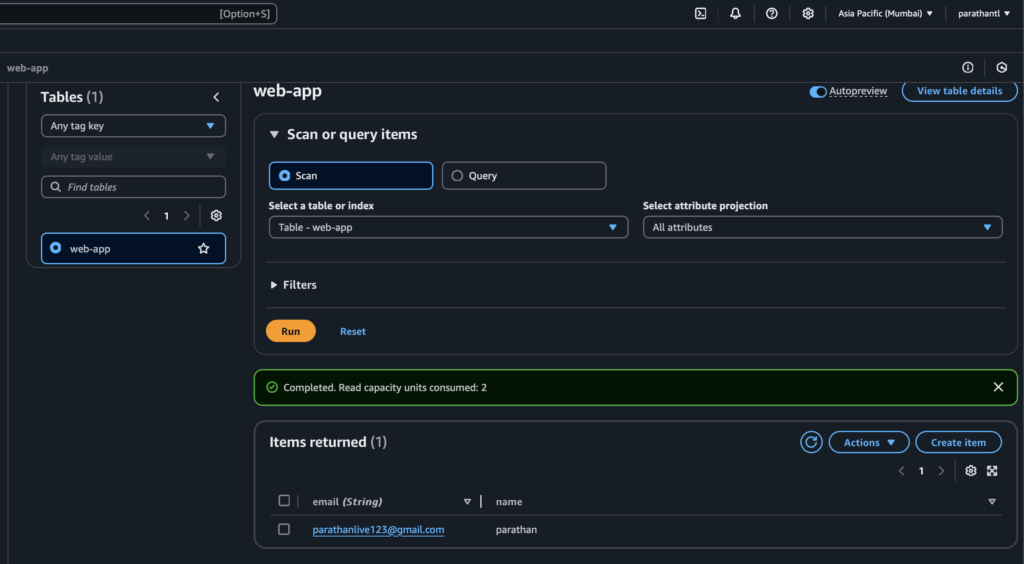
DynamoDB
AWS offers DynamoDB which is a NoSQL database that is a highly scalable, and fully managed serverless database solution that can handle millions of requests per second, offers low latency, and stores and retrieves structured data.
Navigate to AWS Management Console and search DynamoDB
Click on Create Table name web-app , write partition key email as we are only storing email that wants to be unique ID then click on Create Table.
After this, copy the table name web-app and paste in the Lambda function where we had defined it.
After making changes, paste the same to the Lambda function and deploy the changes in Lambda.
Host Static Website on S3
Now, we are going to host our static website index.html on an S3 bucket which is serverless.
Navigate to AWS Management Console and search S3. Remember we will be creating the bucket in Mumbai (ap-south-1)
Create the bucket with your preferred name as the name has to be unique across Global. While creating the bucket uncheck the “Block all Public Access” then click on Create a bucket and upload the index.html file in the bucket.
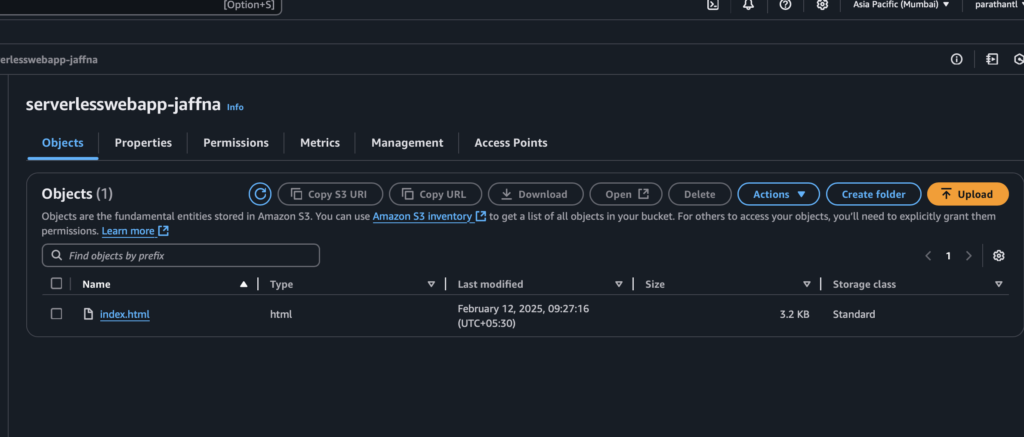
You will receive an endpoint to open the website but it will give you an error because you haven’t added the Permissions. Navigate to the Permissions tab in the S3 bucket and add bucket policy.
{
    "Version": "2012-10-17",
    "Statement": [
        {
            "Sid": "PublicReadGetObject",
            "Effect": "Allow",
            "Principal": "*",
            "Action": "s3:GetObject",
            "Resource": "arn:aws:s3:::serverlesswebapp-jaffna/*"
        }
    ]
}
In Resource change the bucket name to your bucket name.
Now, when you refresh the page you will access the website. So, we hosted the static website successfully on the S3 bucket.
Now, let’s check whether our API, Lambda, and DynamoDB are perfectly working or not.
As we can see data is submitted successfully our API is getting a 200 status code. Let’s check also whether our DynamoDB table recorded the email or not.
In this article, we explored the deployment of our website on AWS using a serverless approach.
Leave a Reply